How to create a listing
- Dec 27, 2024
- 7 min read
Updated: Dec 29, 2024
✷ This manual is about how to create a new listing that appeals to Koreans 2. When entering content in the text box, please ensure that it is either in English or Thai only. Only one language can be translated into Korean for the guest to see, so please avoid mixing different languages together.
Overview
1 Click “Accommodation Management” in the main page

2 Click “Create new listing”

Basic Information
1 Enter your accommodation name or title of listing
When entering the accommodation name, please follow this format:

1.1 Building
Building part will be automatically set when the address of the accommodation is input as guide #5

2 Choose your “Listing Type”
Entire: You get the whole space to yourself, including no shared areas like a kitchen. Example: condominium or house.
Private: You have your own bedroom but share common areas like the kitchen. Example: share house and co-living space.
Shared Room: You share a room with others and also share common areas like the kitchen and living room. Example: guesthouse.
✷ Please select “entire”

3 Choose your “Property Type”


4 Choose your address country

5 Input your accommodation addresses
Select “FIND POSTAL CODE” and search your accommodation name; the system will automatically fill the address
Input room type, room number, and building (A or B). This part will show to the guest only when they confirm the booking.

6 Select your minimum nights of stay
Note: minimum night stay on LiveAnywhere platform is at least 6 nights.

7 Choose “Business Type”
If you are an overseas host please choose “Host with properties outside Korea”:

8 Choose the currency that you want set the price and receive for the pay out

9 Choose the ownership type

Ownership Category
If you are the property owner or the hotel business please choose “I am m a landlord(lessor)"
If you are not property owner or you are sub list of the owner please choose “I am managing this property with the landlord's permission for subletting”
10 Add your bank account
you can follow this guide to update your bank account

11 Click “Save and next” to go to the next page

Space info
1 Enter the size of your accommodation in square meters
Put your room size in the second box as it will be calculated in traditional Korean units of measurement in the first box

2 Enter the number of bedrooms that your accommodation has and choose the room type

Studio room type = “STUDIO TYPE”
One bedroom type = “WITH SEPERATE LIVING ROOM”
The accommodation has 2 floors = “DUPLEX TYPE ”
3 Enter the number of beds by selecting the bed types that your accommodation has

4 Enter the number of bathrooms

5 If your accommodation is a duplex, explain separately what is on each floor

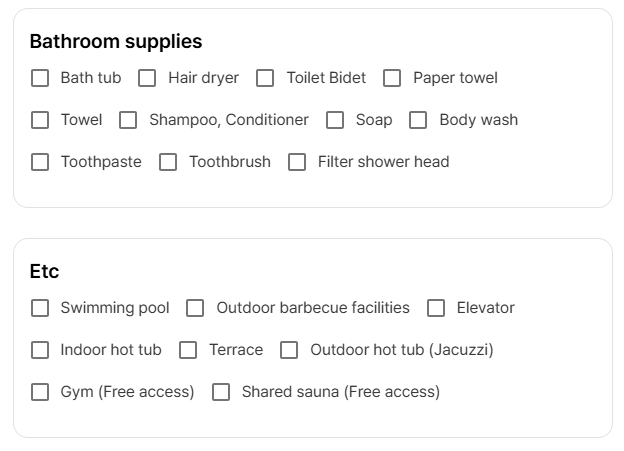
Amenities & Facilities
1 Please check the facilities that your accommodation includes


Detail Informations
1 Enter Guest-friendly locale or nearby amenities that your accommodation has
Example amenities:
🏊🏼♀️ Swimming pool
💪Gym
🧺 Shared laundry
🍳 Shared kitchen
🧹 Cleaning service
🐛 Insect screen
🌐 Wi-Fi speed

2 Neighborhood guide
Share local attractions and Host's picked eateries
In this section, please provide the following information:
Distance from your accommodation to the airport
Distance from your accommodation to the mall
Please check the distance from “Google Maps”
For example:
🛒 (Shopping Mall): 10mins by walk (1km)
✈️ (Airport) 15 mins by car (6km)

3 Highlight what makes your accommodation special
For example:
This place is located in a quiet area, free from noise disturbance from animals and entertainment venues.

Photos
1 Attach and categorize accommodation image
Please attach more than 5 images
Upload the image for each space like bedroom, bathroom, living room.
Representative photo means the first photo that the guest will see
Preview your listing to see how the photos will appear to guests.

Pricing (How to Set the Price)
1 Set the price

Base rate: please put default of daily price of your room which should be set as “per night”
Weekly price: please put the price per night for weekly stay
Biweekly price: please put the price per night for biweekly stay
Monthly price: please put the price per night for monthly stay
What is “optimized pricing”?
When you click the recommended rates apply, the price will be automatically calculated for weekly, biweekly and monthly price base on the the rate per night (in box #1) with discounts of 25%, 35%, and 45% in sequence.

2 Set the discounts
Set the period price that you would like to offer for the special discount. You can select only one period which is 1-31 days only.


Go to discount and select “+ Add discounts”
Then click at “ Set discount periods for up to 31 days”
Then select the date from the calendar (you can select up to 31 days)
When you done selected the period then select the percentage of discount by clicking at “Select discount %”
Note: The percentage of the discount will be calculated base on the price you set as above.
3 Set the peak season rate
To set the peak season price you can set up to 3 time periods (1-62 days per period).
Note: Please note this peak season price per night will be applied to every period of stay regardless of weekly, biweekly or monthly booking.


Go to Peak season rates and select “+ Add section”
Then click at “ Please select a period”
Then select the date from the calendar (you can select up to 62 days)
When you done selected the period then put the price “per night”
To add more period of the peak season, click “+ Add section” (you can add up to 3 sections)
Tip: You can also set this section as your low season price
If your room suppose to have a high price in wider range than the low season price, you can set the higher price as the default price or base rate as the first step and then put the low season price at this section as below example. (The price of both of peak season and low season are set in this section)

Calendar
1 Manage your calendar
You can select the date you would like to open or close by dragging on the calendar as #1
You can select the exact date at the box #2
You can choose to open or close the calendar then click “Save”
Tip: make sure to click "Save" every time you want to update the calendar
You can check the date that you close will be colored as a grey one, and for the available date will be the white one.

2 Make a private memo on the calendar
When you already have the booking on another platform, you can use LiveAnywhere as master calendar by using the memo, you can put the memo up to
50 characters. This memo will not show up to the guest side.

3 Set the check in / check out the same date
If your room is available to check in and check out on the same date. At the preparation period, you can set as "not needed" as below: ⚠️ Please make sure you set the check in and check out time properly for this case.

4 Connect the calendar with the external platform
If you also using another platform or PMS channel, you can refer to how to sync the calendar

Personnel (Personal) Information
1 Input number of guests

If the room has a capacity limit, additional guests cannot be added. Please input the number of people and check Box #1. If it is possible for the extra guest please uncheck and put the number of maximum guests.
Enter the standard number of guest in #2
Enter the number of extra guests (should less than the number of standard guest) in #3

If there is a fee for extra guests:
Please check “THERE IS AN EXTRA GUESTS FEE”
Enter the additional fee per guest per night (for example:300 THB per 1 person per night)
2 Select whether pets are allowed in the accommodation

If the pet is allowed:
Please check " ALLOW”
If it is possible for the small animals only please turn the button on
Input the pet weight that can be accommodated
Deposits and Utility Fees
1 Set the security deposit
If no deposit is required, please check “No”
If you require a deposit, please check “Yes”

How much security deposit that you want to collect from monthly stay guest
How much security deposit that you want to collect from 2 weeks stay guest
How much security deposit that you want to collect from weekly stay guest
2 Utility fee setting
If the rent fee is already included the utilities fee, please check “No”
If the rent fee is excluded the utilities fee, please check “Yes”
Please note that the utility fee entered will be calculated for the entire booking period, whether it is 1 week, 2 weeks, or 1 month.

3 Cleaning fee setting
If the rent fee is already included the cleaning fee, please check “No”
If the rent fee is excluded the cleaning fee, please check “Yes”
This cleaning fee apply per booking.

House Rules
1 House rules setting
In this part you can set the check-in and check-out time
You can check in the check box about house rules (self check-in, no smoking, no loud noise, etc)

2 Additional rules

In this part please provide special policy and other things to know. This is the information you need to provide when create new listing:
✅ how to late check-in
✅ how to check-out
⚠️ special policy

Comments